To thrive in the crowded world of E-Commerce, retailers need Beautiful Products Images. Photoshop is the best software for image beautification, and Clipping Path is a basic need before advanced-level editing.
Clipping Path outlines any image by using Photoshop Pen Tool. It allows for removing the original background and setting a new background. In the final view, after applying Clipping Path, objects inside the path will be included, and objects outside the path will be excluded. And the edge of the objects will look hard. Clipping Path Flatness will minimize the hardness, and the objects will look more realistic.
Photoshop Clipping Path is the basic task before advance level work, like
- To remove/change the background
- To create the mirror effect
- To create the drop shadow
- To remove unwanted objects
- To remove the ghost mannequin
- To separate objects by multiple clipping paths for color changes
- To smooth the edge by clipping path flatness
- For photo manipulation
- For image masking
- For e-commerce product retouch
High-quality Image Editing and Clipping Path services are needed for Professional Photographers, Art Directors, Studios, and Agencies, as well as all types of web-based companies like E-commerce businesses, online shops, design shops, etc.
Clipping Path Business is the most popular concern for the E-commerce sector, whose have different types of images to get the attention of its customers.
In this Photoshop Clipping Path tutorial, we will learn, in an easy way, to create Clipping Path by using Photoshop Pen Tool from Adobe Photoshop software.
How to do Clipping Path?
Here are the steps of the Photoshop Clipping Path Tutorial
Step 1: To draw the path, first of all, need to open an image in Photoshop, then select the “Pen Tool” from the “tool box” (if you can’t see the toolbox, go to the window menu and select “Tools”). Now, ensure that you have selected “Paths” from the “pen tool menu bar” located below the main Menu bar.
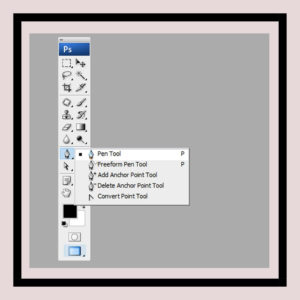
Photoshop Pen Tool
If you want to rename the path name, then double-click on the “work path” and rename it.
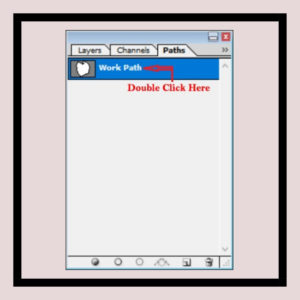
Path Rename
Step 2: Now zoom the image by 200% to 400% depending on the resolution of the image. Zooming enables the creation of sufficient and good anchor points. Then click on the image edge, drag the mouse pointer toward the next step, and release the mouse. After an appropriate distance, again click on the image edge and continue until you have completed moving around the image; after completing the moving, click on starting point to close the path.

Step 3: After doing the path, go to the triangle-shaped icon at the top right corner of the Paths palette and select “Clipping Path.” A dialogue box will appear, asking you to choose your desired path and flatness. Select the path you want to Clipped, put the flatness you desire, and click “OK.” You are now almost done. Flatness is the desired amount of pixels you want to blur the image edge. The more amount you use in flatness, the more the image edge will be blurred. In general, leave the Flatness box blank (0), and the image edge will be 100% sharp, which is most of the time appropriate.
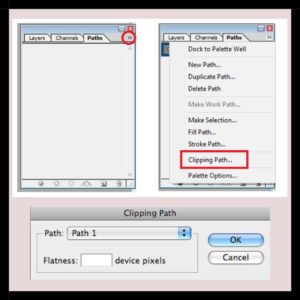
Path Palette Popup Menu
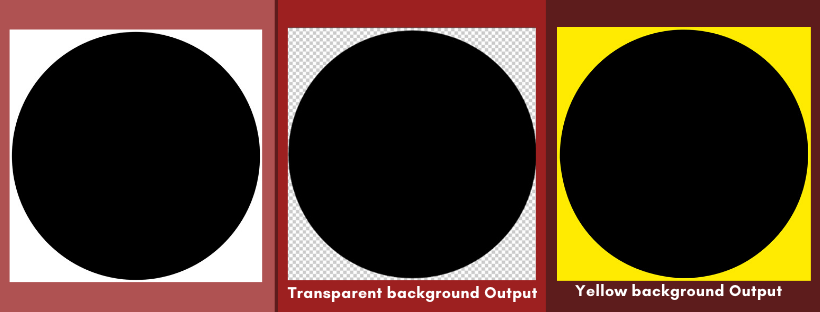
Step 4: You can now save the file in JPG, PNG, PSD, or TIFF format and be ready to place it into the program you are working with for your design. This time you will get the image without the background and will able to set any new background or color.
Congratulations, You’re Done!
I hope that you’ve enjoyed the Photoshop Clipping Path Tutorial and learned something new for your own projects. Nowadays, you will find lots of opportunities by starting a career as a Freelance Graphic designer.